I recently put up a video on my YouTube channel about my scanning process (avalible here).
In it, I shortly show Darktable, and how I invert the images there.
I have since inverted a few more images with Darktable, and figured out a workflow for myself. I thought I would share it with you here because written instruction is superior to a video tutorial (at least in my book).
Disclaimer! I’m still new to Darktable, this is just how I’ve been doing it, and I’m super happy with the results. I encourage everyone to also read the official documentation.
My workflow
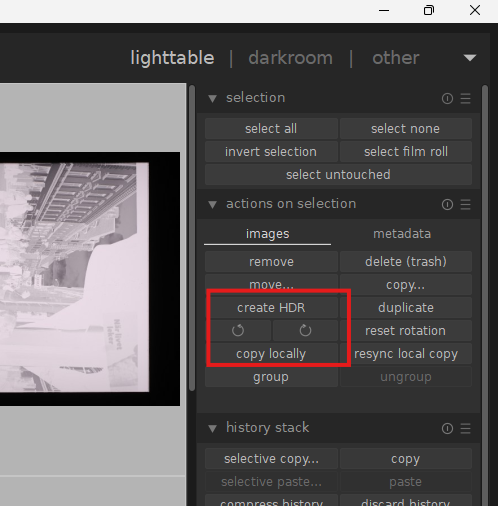
- Fix the orientation of your images if necessary. You can select multiple images in Lightable and then use the controls to rotate all images at once.
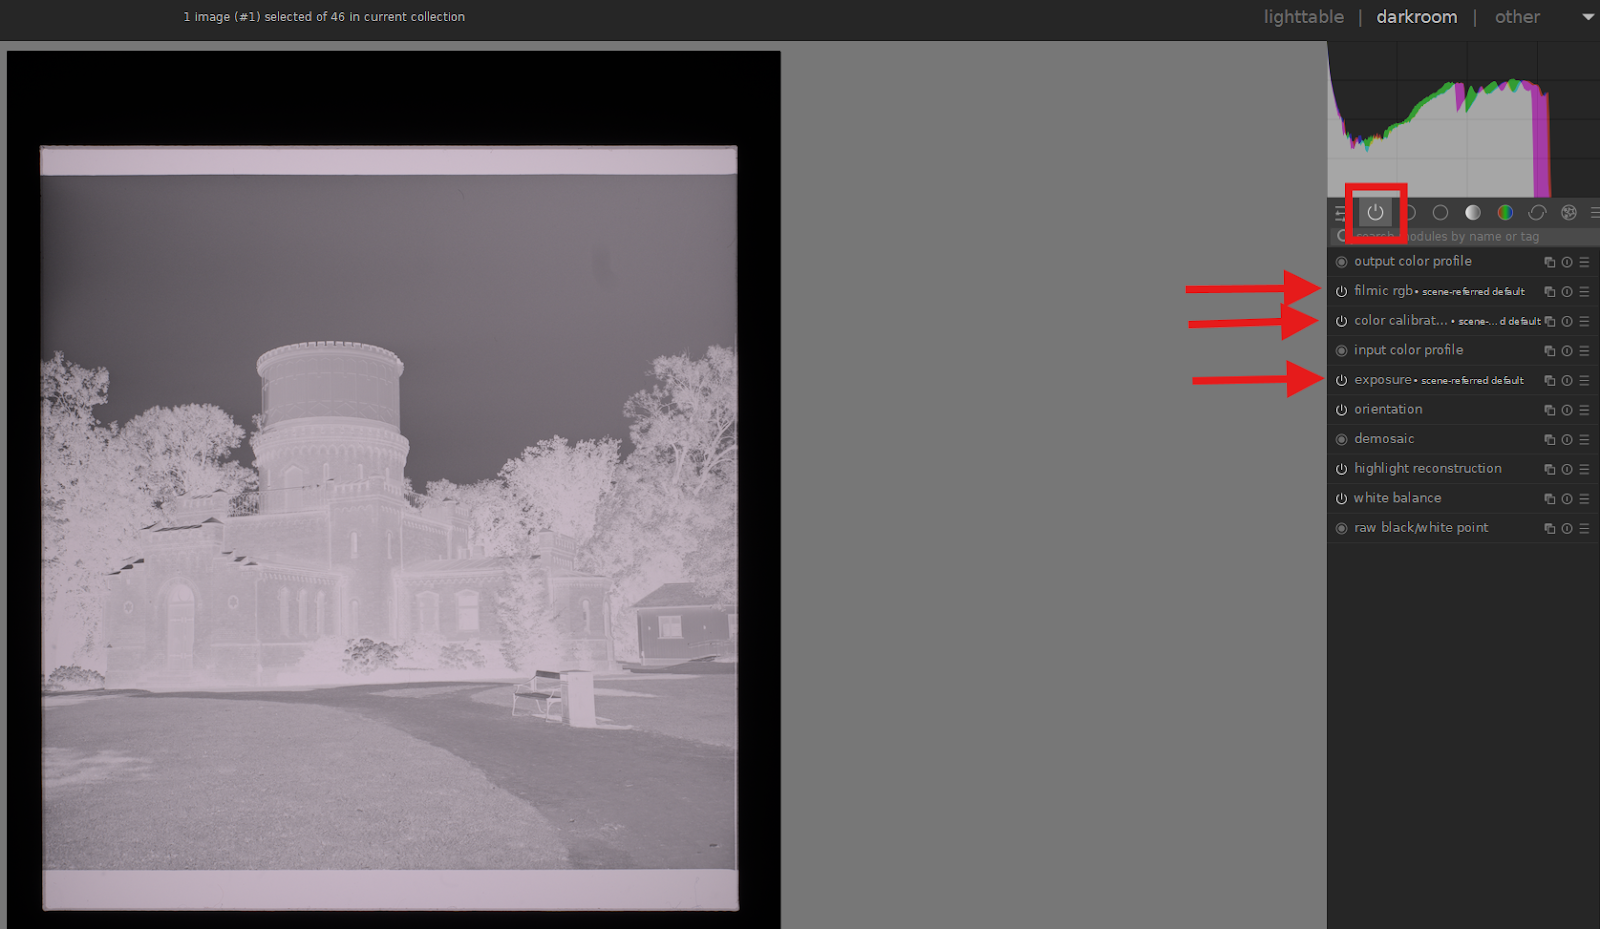
- Jump over to Darkroom, turn off “Filmic RGB”, “Color Calibration”, and “Exposure”
- Go to white balance, and fix the white balance. If it’s a black n’ white image you can sample pretty much anywhere of the image. Use the droplet tool for this, and draw a rectangle anywhere on the image.
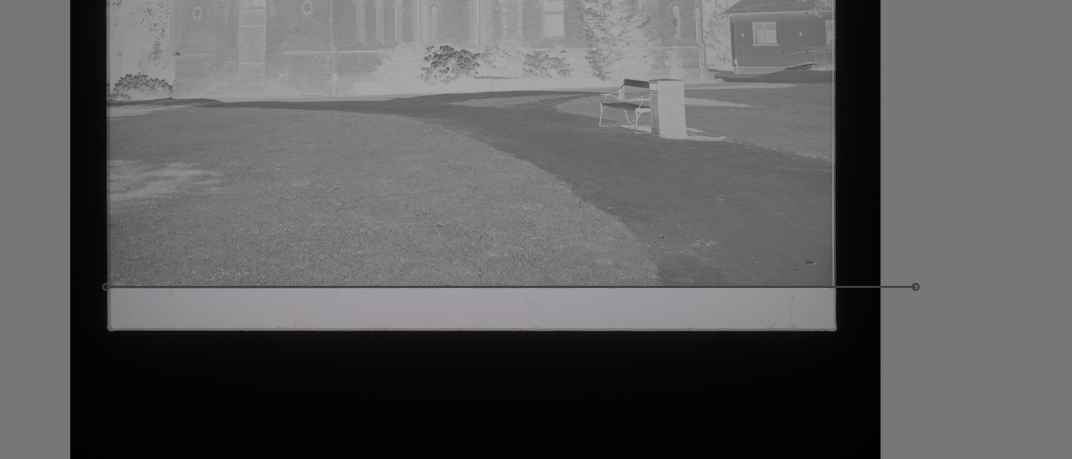
- Next step is to straighten out the image, if nessery. To do so, close any tool opened, and right click and draw a line.
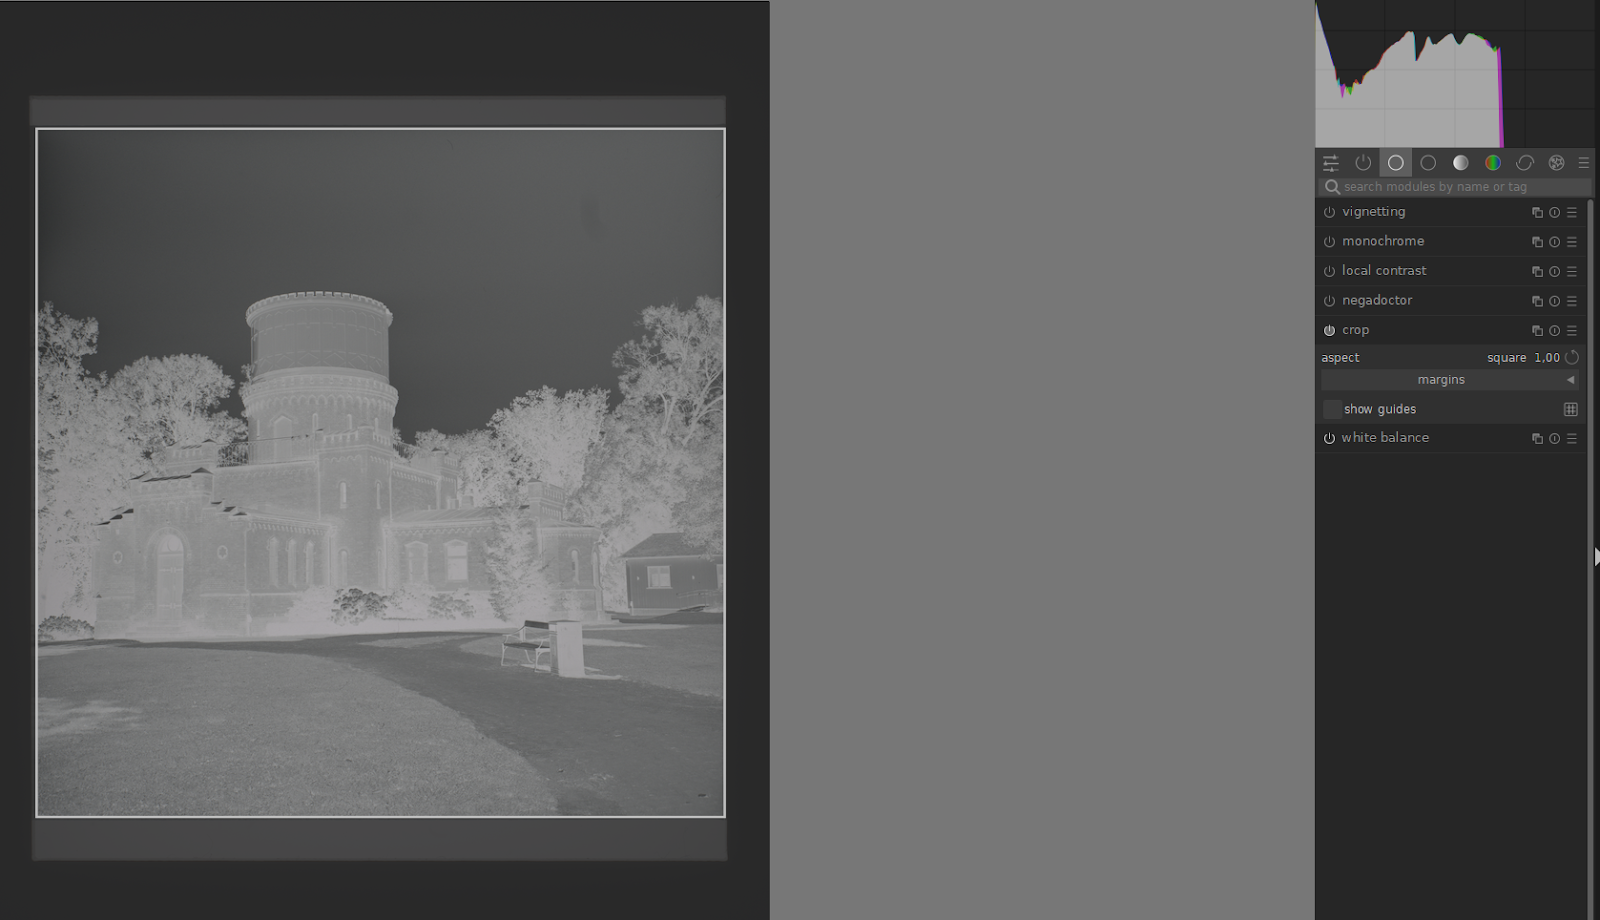
- Fix the crop with the crop tool, this is important so that the histogram reflects your actual image. Make sure to include only the actual image. You can leave a bit of the border if you’re scanning a colour image, if you’re scanning BnW this isn’t needed.
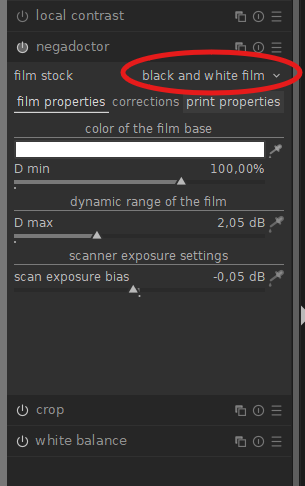
- Open negadoctor, and select Black and White Film
- Start whit the Film Properties tab. I see this as fixing any issues with the negative. When scanning BnW you don’t need to adjust the film base or the D min-value (these two are linked to each other).
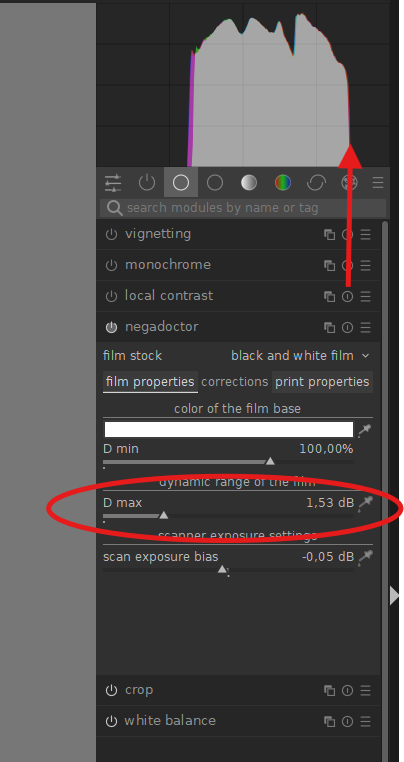
Instead, start with D Max. This is your white point (after inversion). You can either sample the image, which works sometimes. But I find it easiest to drag it so the histogram is as far to the right as possible. This is a little tricky as the histogram might show levels that aren’t actually within the dynamic range of the film, as modern digital cameras surpass that of analogue film.
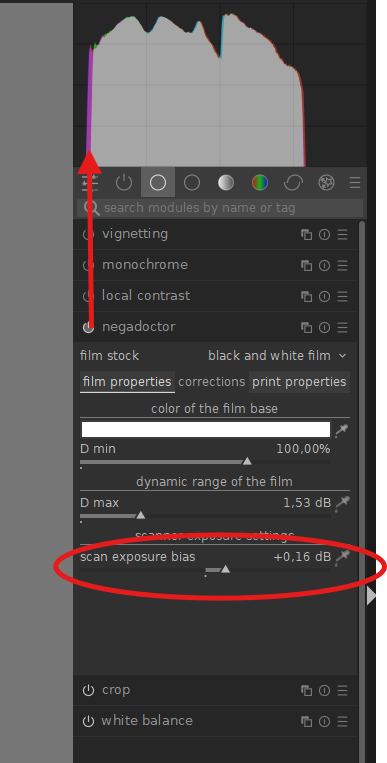
Drag it until you see values disappearing and then move it back slightly. - Now it’s time to move back the midtones and black point, do this by adjusting the scan exposure bias. We are looking for almost clipping at the black point this time.
- You might need to play around a bit with adjusting D Max and Scan Exposure bias, it’s a bit of a balancing act. When you’re done, you’re image should look a bit like this. It might be a bit flat-looking, but that’s ok we’ll fix that in a minute.
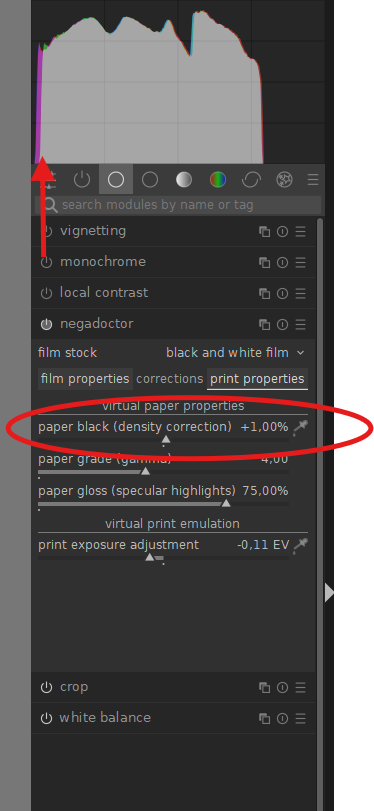
- For BnW-images you don’t need to touch the correction tab. Move over to Print Properties. Which I like to see as adjusting the final print.
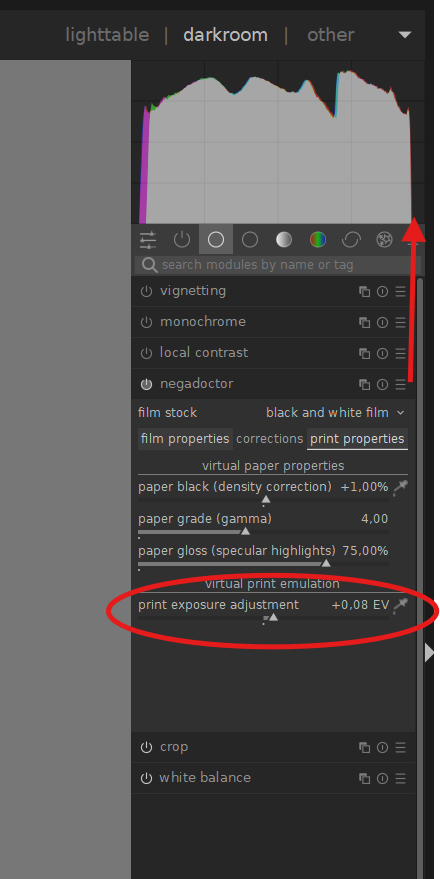
Start with Paper Black, which is your printed black point. This is a bit of an artistic decision, but I like to bring down the black so I have a proper black point. I hope that makes sense. - Now it’s time for print exposure adjustment.
This is bringing up the mids and white point, to a place of your liking.
Much like we did in Film Properties. - Finally, it’s time to decide on the paper. You have one slider for Paper Grade, this is how hard paper you want to simulate, which basically is your contrast slider.
And you have one slider for Paper Gloss, which simulates a matt or shiny paper. It does so by bringing down, or up, the very edge of the highlights.
And once you’re done with these, you got a pretty damn good scan.
I would say you’ve done 90 % of all the work with just one module. It’s awesome! - As a final touch, I like to add three modules. Local Contrast, Monochrome and Vignetting.
Local Contrast at its base value just adds enough contrast to make the image work well on a digital display.
Monochrome is to remove any reminiscences of colour in case the white balance is slightly off (it’s hard to get 100% accurate, and not needed 99% will do).
Vignetting is just something I like to add to my images. And I often have slightly bright corners, due to old camera 😀


Custom menu
Darktable is in general a great program, and highly customisable. Among others, you can create custom categories. I’ve done so for my negative conversion. This is how you do that:
1. Go to the hamburger menu to the right of categories

2. To not have to start from scratch duplicate your preferred category group. I like to be able to see all tools, so I use “Modules: all”

3. Give your new “preset” a name

4. Click the little plus next to module groups. And you’ll get a new group to the right of the existing ones.

5.Populate the group with the tools you want with the plus, and with the arrows you can move the tool-groups position. I like to have mine on the very left.
The tools I like to add are as shown by the picture below.

6. It saves automatically, so once you’ve finished just close the window with the “X”, and your new Tools Preset is available in the hamburger menu.
